

• Home
  • Seller Help
  • Manage Restaurant
  • Quick Links
    • Register Now
    • Seller Login
    • Terms & Conditions
Seller Login
h1-favicon-shape New Project (3)
aratoi
  • Home
  • Seller Help
  • Manage Restaurant
  • Quick Links
    • Register Now
    • Seller Login
    • Terms & Conditions

How can we help you?

Getting Started

4
  • Introduction
  • How it works?
  • Rules
  • Terms used

Web Panel help

23
  • Create Seller Account
  • How to Subscribe to a plan
  • How to Add Store
  • Manage Attributes & variations
  • How to manage Add-ons and add-ons groups
  • Add stock quantity to add-on items
  • How to Add Products?
  • Common Errors while adding a product
  • How to Add FAQ to Products
  • How to Bulk Upload Products
  • Dashboard
  • Point of Sale
  • Categories
  • How to Withdraw my sale earnings?
  • How to run Ad Campaigns
  • Manage wallet
  • Manage Seller notifications
  • Manage my store employees/workmates
  • Manage tax Rates
  • Manage Brands
  • How to Manage Orders
  • Payments
  • Return Orders & Refund

Seller App

5
  • Create Account in Seller App
  • How to Add Store?
  • Create Attributes eg Size:S,M,L
  • Add Product (in Seller App)
  • Add product with Size, Color etc

Sell Fast Tips

7
  • Introduction
  • How to Create Campaign
  • Run Ads campaigns
  • Discounts on Products
  • Who Should use variation products
  • Use High-Quality Product Photos
  • Other tips to sell fast

Restaurant

3
  • Create Restaurant
  • Add-on groups
  • Manage Add-ons using Seller App
  • Home
  • Docs
  • Web Panel help
  • How to Add Store
View Categories

How to Add Store

1 min read

Get help for Seller app here
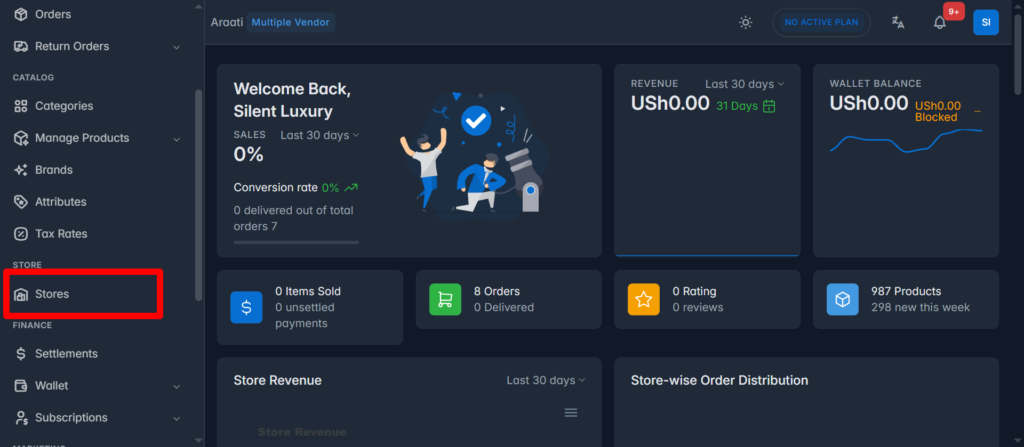
Navigate to your seller dashboard panel>Click on Store in the left menu>Add new store

1. Basic Details #
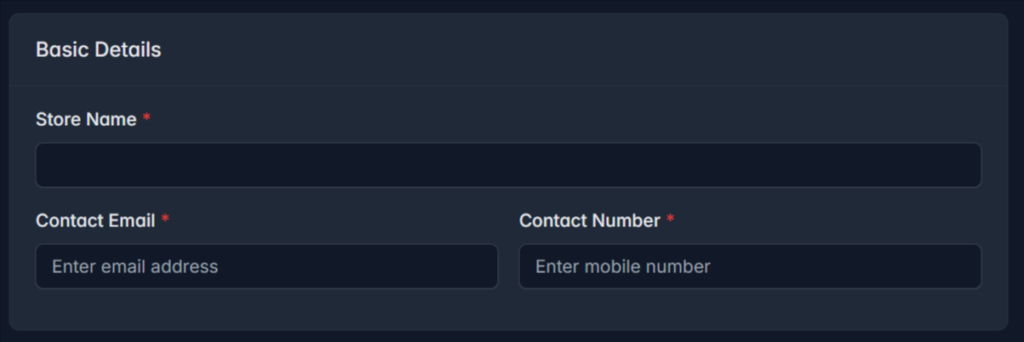
Enter store name, Email and Contact Number (All Required)

2. Location Details #

Search for or select your store location on the map. Once a location is selected, the system will automatically populate the required fields, including Country, Address, Landmark, City, State/Region, ZIP/Postal Code, Latitude, and Longitude.

If any of these fields are not filled automatically, please enter the information manually, as all fields are required to complete your store setup.

3. Logo & Banner #

Upload store logo – square shape is recomended (Required)
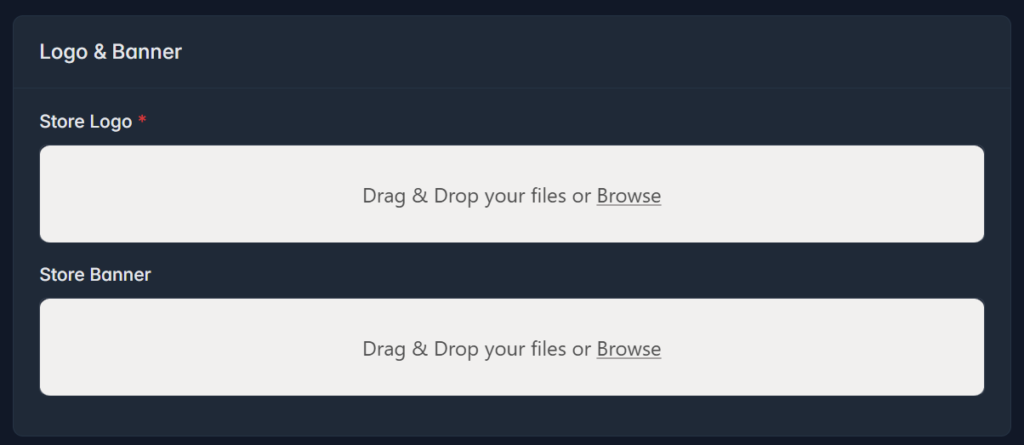
Upload Store Banner – An holizontal shape is recommended.

4. Business Documents #
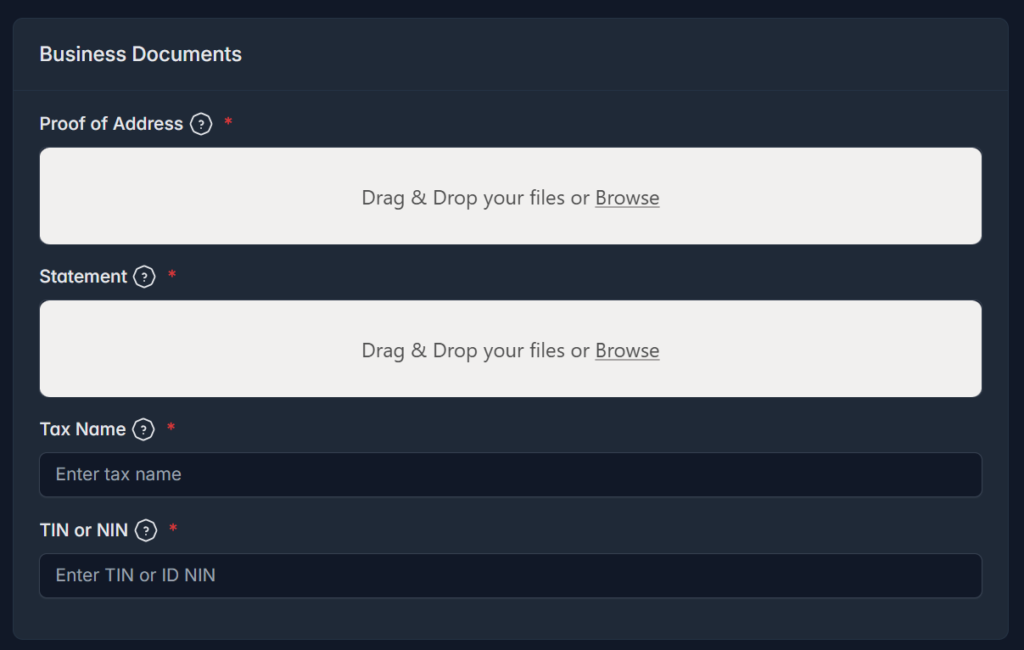
Proof of Adress for your store, this can be your rent receipt, photo of your business store showing location etc

Statement. This information will be used to verify your payment account. Please upload a valid Bank or Mobile Money transaction statement or screenshot clearly showing the registered mobile number, account holder’s name. This information will be used solely for payment verification purposes.

Enter Tax information, Tax name eg trade license, VAT and Tax Number (TIN) on your trade license. You can also use your ID NIN

5.Bank or Mobile Money Account #
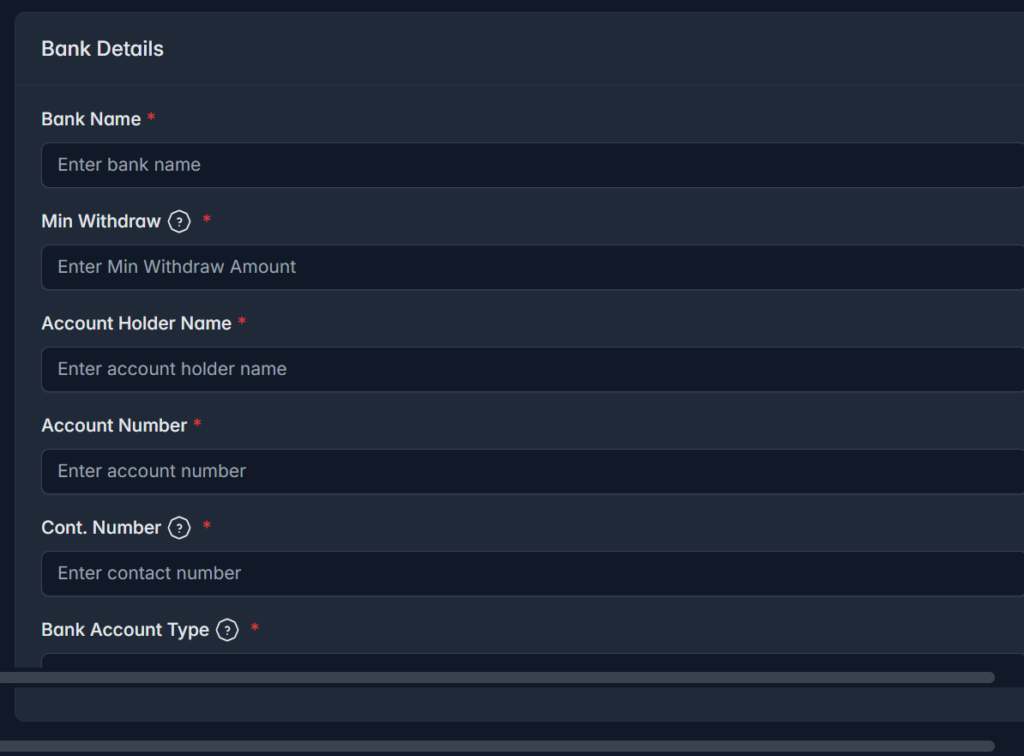
Enter Bank Details or mobile money information to receive your payments via mobile money

6. SEO Information #

This section help increase your store presence on google search, see below image.

  1. This is the SEO Title
  2. SEO Description
  3. SEO Keywords

Now that you have set up your store, Let me explain some of the words in your dashboard.

araati, create account, store
What are your Feelings

Share This Article :

  • Facebook
  • X
  • LinkedIn
  • Pinterest
Still stuck? How can we help?

How can we help?

Updated on August 12, 2026
How to Subscribe to a planManage Attributes & variations

Leave a Reply Cancel reply

Table of Contents
  • 1. Basic Details
  • 2. Location Details
  • 3. Logo & Banner
  • 4. Business Documents
  • 5.Bank or Mobile Money Account
  • 6. SEO Information

Newsletter

Keep up out latest update subscribe to our newsletter!

    Quick Navigation

    • About us
    • Features
    • Pricing
    • FAQ's

    All Page

    • Home
    • Contact
    • Blogs
    • Privacy Policy

    © All rights reserved

    Powered By Araati Uganda